Collecting Your Samples
Set yourself and your samples up for success by following these DNA sampling instructions. Whether you’re new to sample collection or just want a refresher, we’re here to help.

Jump to Instructions
Collection with a Tissue Sampling Unit (TSU)
TSUs are one of the preferred DNA collection methods and acceptable to use when sampling twins. Animals should be restrained during sampling. This is commonly done with a head gate.
The instructions below were prepared with reference to Allflex® materials.
Get Ready
Tissue sampling units and blood cards are the preferred sampling methods. You can collect DNA samples at any age, but hair samples are not recommended for an animal less than four-months old.
For both tissue samples and blood samples, wipe the animal’s ear clean using a cloth or towel before collection. Don’t use any chemicals to clean the ear.
How to Take a TSU DNA Sample
Prepare for Loading
Loading: Step 1
To load the applicator, remove a TSU unit from the packaging. TSUs should be assembled as one piece. If they have come apart, reassemble. Take your operation to the next level with our genomic testing technology.
Order supplies
Loading: Step 2
Ensure the tube retainer at the base of the applicator gun is open. Push the retainer clips to open.

Loading: Step 3
Insert the TSU into the tissue applicator as shown below. Release clips to lock TSU into the device.

Loading: Step 4
Squeeze the applicator handles together, guiding the TSU tip into place, if necessary. You will feel a “locking” action once properly placed. When fully seated, the gun bolt will rest flush against the white metal cutter.

Loading: Step 5
Release the handle and remove the red plastic clip by pulling it outward. Take care not to cut your finger on the metal cutter – it is very sharp!

Loading: Step 6
The applicator is now loaded and ready to take a sample. All parts are for one use only, so do not reuse metal cutters.
Time to Extract the Sample

Sampling: Step 1
Ensure the tissue applicator is loaded with an unused tissue punch (the red plunger is visible in used punches).
Sampling: Step 2
Slide the gun over the ear and position the cutter approximately 1 inch from the edge of the ear, taking care to avoid any obvious veins and ridges (see the illustration above).
Sampling: Step 3
Squeeze handles together to take a sample and then release to free the ear. Try to do this in one swift, fluid, motion. Move with the animal and don’t fight its movements.
Sampling: Step 4
Remove the punch from the device and check that sampling has been successful. If not, discard the sample and re-sample with a new punch.
Sampling: Step 5
Remove the used cutter from the applicator by pulling the handles apart. This will loosen the cutter. Discard safely, and use caution as the cutter is very sharp.
Post Tissue Extraction
Once the tissue sample has been successfully extracted, care should be taken to store the sample at room temperature and away from sunlight for up to a year. We recommend freezing the sample after a year, for long-term storage.

COLLECTION WITH A BLOOD SAMPLE
Review the steps below on how to collect an appropriate blood sample for testing submission.
DNA Collection Tutorial: Blood Sample
-

Step 1
Record animal identification number (tattoo and/or tag number) on a DNA card.
Order DNA cards -

Step 2
Prick the vein in the animal’s ear with a sterile needle. If needed, wipe the animal’s ear clean using a cloth or towel before collection. Don’t use any chemicals to clean the ear.
-

Step 3
Touch the circle on the DNA card to the blood site on the ear. Fill the circle completely.
-

Step 4
Allow the card to dry away from direct sunlight for at least 24 hours prior to mailing. Do not mail the card in a sealed plastic bag.
Submit Cards
Is my blood sample card acceptable?

Acceptable
Ideal card submission

Unacceptable
Not enough blood on sample card.

Unacceptable
Sample card is contaminated with feces.
COLLECTION WITH A HAIR SAMPLE
This is an acceptable method for twins. It is not recommended for use with animals younger than four months. An additional sample handling fee of $2.50 per sample is charged when hair is not on proper hair cards. Contact the customer service team for proper hair cards.
DNA Collection Tutorial: Hair Sample
Step 1
Record animal identification number (tattoo and/or tag number) on the hair card.
Contact us for cards
Step 2
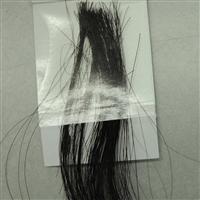
Pull from the tail switch “up and away” to collect 20-30 hairs with root bulbs, which contain the DNA.

Step 3
Place root bulbs on the back flap. Peel off backing paper from the sticky flap.

Step 4
Press the sticky side on top of the root bulbs to seal the sides. Hair bulbs must be present to perform tests.

Step 5
Trim excess hair to the edges of the hair card.
Is my hair sample acceptable?

Acceptable
Ideal hair sample size.

Unacceptable
Excess hair not trimmed.

Unacceptable
No root ball on hair sample.
Partners in Testing


Tools at your fingertips
Leverage your access to the world’s leading beef genetic database to advance your herd.
Need help? About AGI Seedstock Tools View seedstock pricing


